
Read also this article: https://glamorabeauty.blog/12-gorgeous-outdoor-party-setup-ideas-for-instagram-worthy-events/
A small kitchen doesn’t have to feel like a compromise. With the right layout, storage strategy, and a few smart design choices, even the tightest kitchen footprint delivers a space that looks good and works harder. These 25 small kitchen ideas cover everything from low-budget weekend projects to layout changes that shift the entire feel of the room – practical, specific, and built around how real kitchens actually get used.
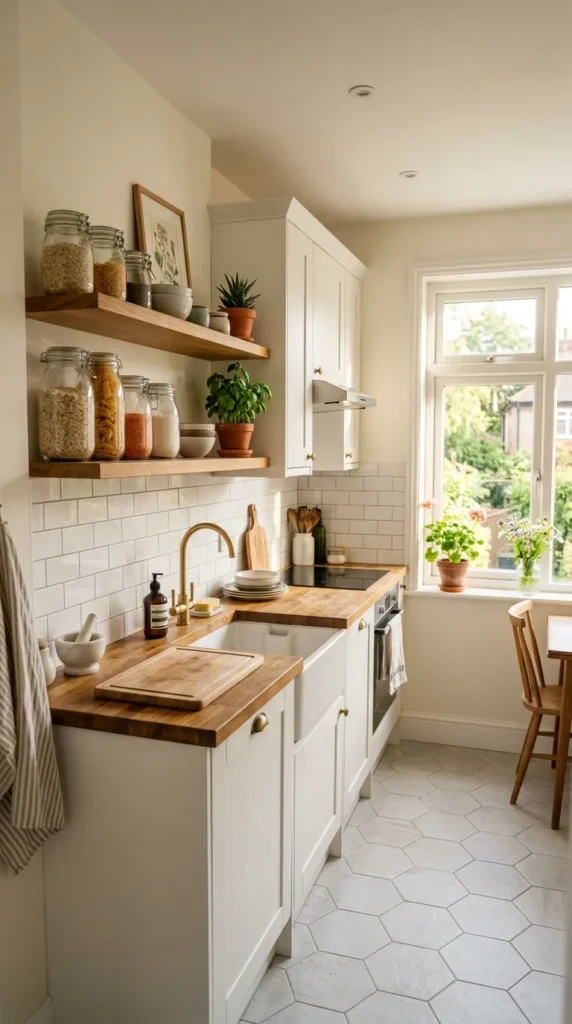
1. Go Vertical With Open Shelving
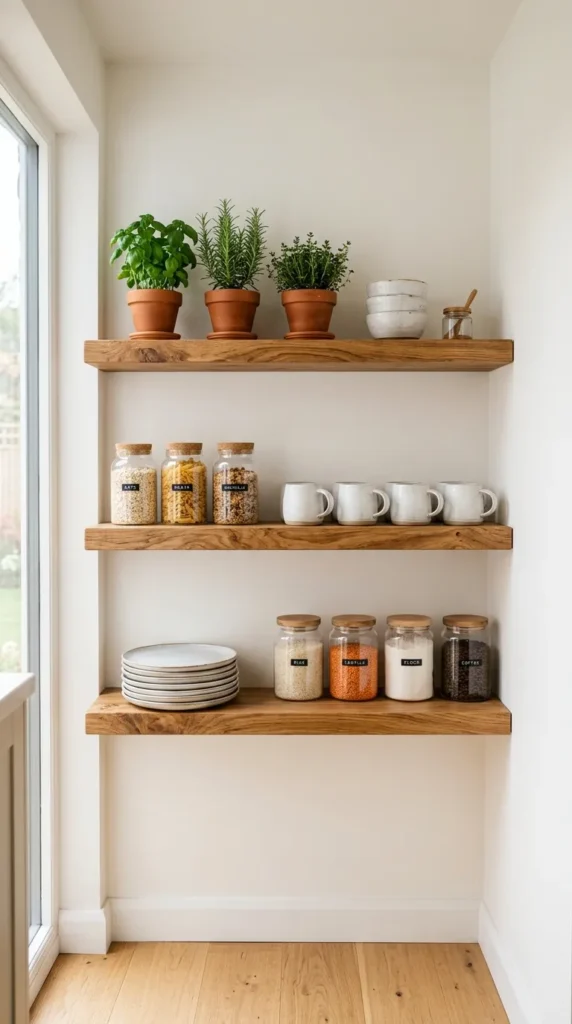
Most small kitchens waste the wall space above the counter. Open shelving turns that dead zone into active storage.
The fix is simple. Install two or three floating shelves between the counter and ceiling. Use the top shelf for items you grab less often. Keep the lower shelves for everyday plates, mugs, and dry goods in clear jars.
Open shelves also make the kitchen feel less closed-in than upper cabinets. Cabinet doors visually chop up the wall. Shelves keep the eye moving upward, which makes the ceiling feel higher.
Budget tip: Solid pine boards from a hardware store, cut to size and mounted with bracket supports, cost around $30-50 per shelf. Sand, stain, and seal them in a weekend.
Keep shelves tidy. Open storage shows everything, so edit what you display. Stick to three or four consistent materials – wood, ceramic, glass – and the shelves look curated rather than cluttered. A small basket on each shelf handles the random items that don’t have a natural home.
2. Pull-Out Pantry Between the Fridge and Wall
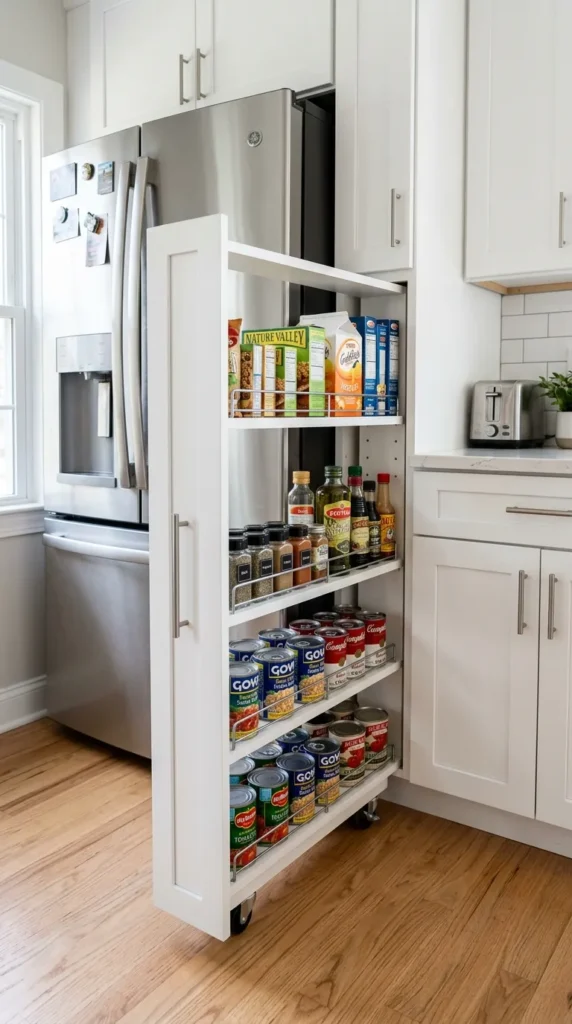
That narrow gap beside your fridge – usually 4 to 6 inches wide – does nothing on its own. A pull-out pantry unit fits there and adds serious storage without taking floor space.
Pull-out pantry carts are available ready-made for around $40-80 and slide in and out on casters. They hold spices, cans, condiments, snacks, and anything else that normally piles up on the counter or gets lost at the back of a cabinet.
Measure the gap carefully before ordering. Most units come in 4-inch, 5-inch, and 6-inch widths. Add a small handle to the front edge so it pulls out cleanly.
DIY version: Build a simple tiered frame from 1×4 pine boards, add casters to the base, and paint it to match the cabinets. The whole build takes a Saturday and costs under $25 in materials.
This idea works especially well in galley kitchens where every inch of wall space counts. It keeps the pantry items accessible without needing a separate pantry cabinet. Once it’s in, you’ll wonder what you ever kept in that gap before.
3. Magnetic Knife Strip Instead of a Knife Block
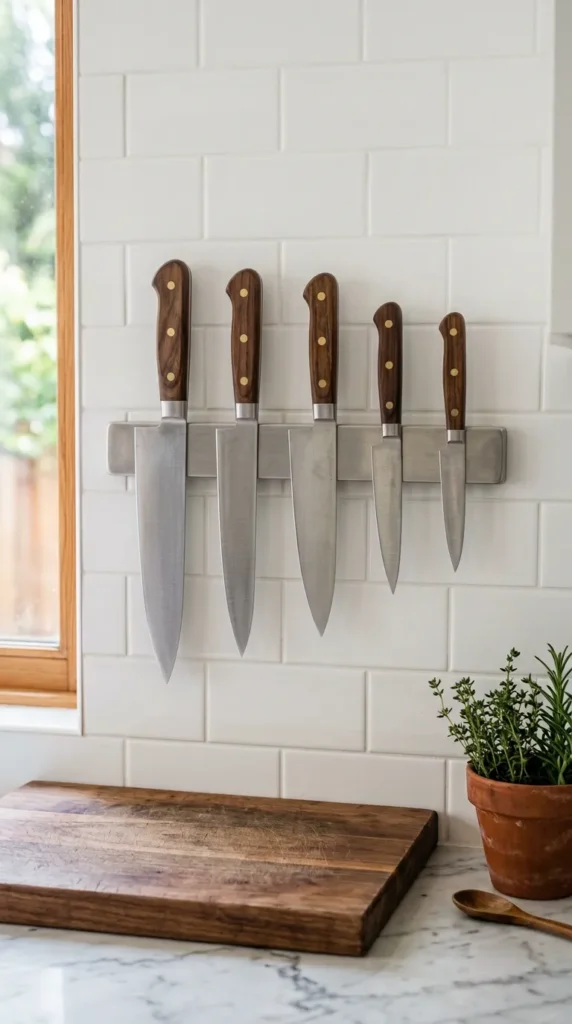
A knife block sits on the counter and eats up a footprint roughly the size of a large coffee mug – permanently. A magnetic knife strip mounts on the wall and uses zero counter space.
A quality magnetic strip costs $15-35 and installs with two screws into the backsplash or wall. It holds 5 to 8 knives depending on length, keeps them visible and accessible, and cleans in seconds.
The strip works for more than knives. Mount a second one near the stove for metal utensils – ladles, spatulas, tongs. They hang by their hooks or press flat against the magnet if they contain enough steel.
DIY option: Wooden magnetic strips with a routed channel holding a hidden magnet bar look more refined than bare metal and blend with wood shelf aesthetics. Build one from scrap hardwood for under $10.
Freeing up counter space in a small kitchen has a compounding effect. One strip replaces the knife block, clears a square foot of counter, and makes the whole surface feel less crowded. In a kitchen where counter space is already tight, that single change shifts how the space feels to work in every day.
4. Fold-Down Wall Table for Dining or Prep
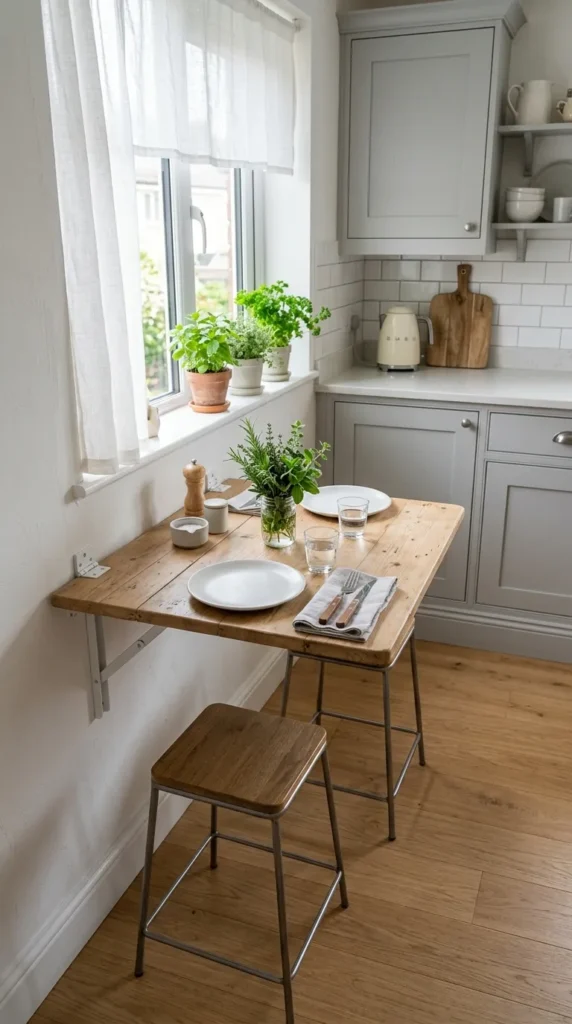
A fold-down table mounted on the wall solves two problems at once – it gives you a dining surface and extra prep space, and it disappears completely when you don’t need it.
Wall-mounted fold-down tables cost $40-120 depending on size and material. They mount on a piano hinge or bracket system, fold flat against the wall, and take up less than 4 inches of depth when closed.
Size the table to your wall space. A surface 24 inches deep by 36 inches wide comfortably seats two people or gives you a full extra prep area when cooking.
DIY version: A solid pine board, a piano hinge, a fold-down leg bracket, and a Saturday afternoon. The whole build costs under $50 and the result is identical to store-bought versions.
Position the table near a window if possible. Eating next to natural light makes a small kitchen feel less like a working space and more like a proper dining room. When the table folds up, nothing remains visible except a slim panel flush with the wall. It’s the furniture equivalent of a Murphy bed – maximum function with minimal footprint.
5. Toe-Kick Drawers Under the Base Cabinets
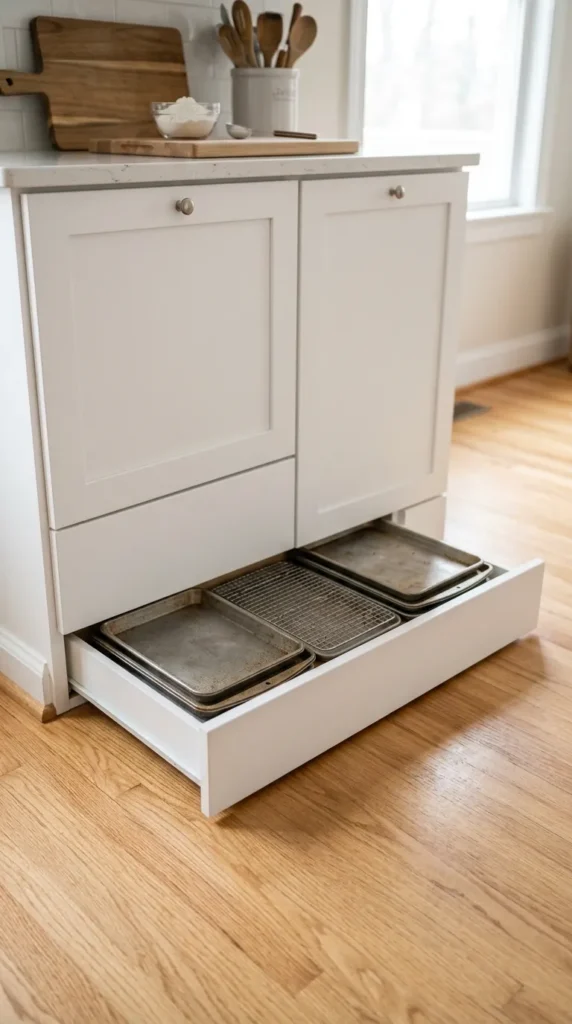
The space under your base cabinets – that recessed strip at floor level called the toe kick – runs the entire length of the kitchen. Most kitchens leave it completely empty.
Toe-kick drawers convert that strip into storage for flat items: baking sheets, cutting boards, pizza trays, placemats, and table linens. Each drawer is shallow, about 4 inches deep, but wide enough to hold a full set of sheet pans.
Retrofitting toe-kick drawers into existing cabinets is a weekend project. Remove the existing toe-kick panel, install a drawer slide track, build a simple shallow drawer box, and reattach the panel as the drawer front.
Budget: Hardware and wood for two toe-kick drawers runs $30-60. Professional installation typically adds $200-400 per run of cabinets.
The biggest advantage is that toe-kick drawers don’t steal space from anywhere else. They use dead space the kitchen already had. Baking trays are notoriously hard to store – they’re flat, they slide around, they fall over. A dedicated toe-kick drawer ends that problem entirely. Pull it open with your foot, grab the tray, close it with your toe. No bending, no digging through a cluttered cabinet.
6. Light Colors on Every Surface That Can Hold Them
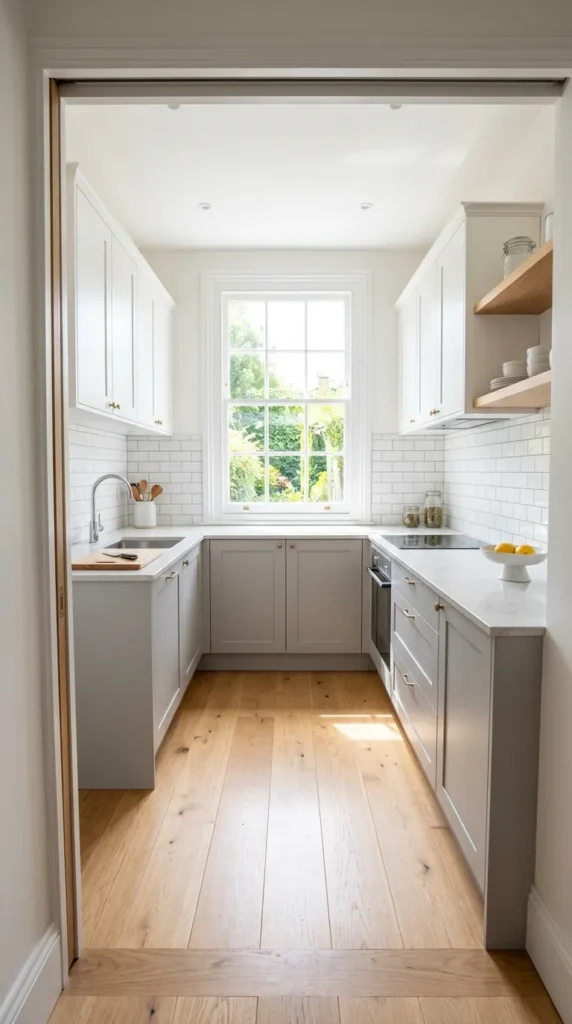
Color is the cheapest way to change how large a kitchen feels. Light colors on walls, cabinets, and countertops bounce light around the room and push the walls back visually.
White, off-white, pale grey, and soft sage all work. The goal is to keep the eye moving smoothly without dark surfaces stopping it. A dark cabinet, even in a spacious kitchen, creates a visual boundary. In a small kitchen, that boundary makes the room feel like it ends sooner than it does.
You don’t need to repaint everything. Repainting cabinet doors alone changes the room dramatically. Sand lightly, apply a primer coat, then two coats of semi-gloss cabinet paint in a light tone. Cost: under $80 for a full set of cabinet doors.
One contrast works well. A single darker element – a navy island, a charcoal lower cabinet – gives the eye something to land on without making the room feel heavy. Everything else stays light.
Keep the countertop light too. A white or pale stone countertop reads as part of the wall rather than an obstacle. Dark countertops in small kitchens create a visual barrier across the middle of the room that cuts the space in half perceptually.
7. A Rolling Cart That Works as a Mobile Island
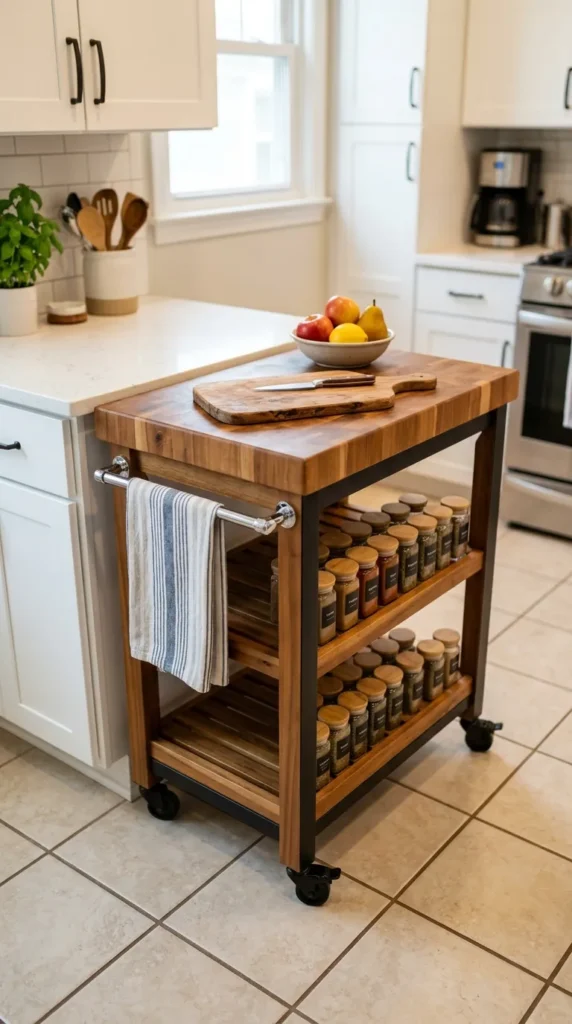
A fixed island takes floor space permanently. A rolling cart gives you the same extra prep surface and storage, but rolls out of the way when the kitchen needs to function as a thoroughfare.
A solid rolling kitchen cart costs $80-200 depending on material and shelf configuration. Look for one with a butcher block or solid wood top (doubles as a cutting surface), a lower shelf for storage, and a towel bar on the side.
Park it against a wall when you’re not cooking. Pull it to the center when you need extra prep space. Roll it to the stove when you need a staging area for plating.
DIY version: Take a basic IKEA RÅSKOG cart ($30) and add a custom-cut butcher block top, secured with wood screws from underneath. The result looks considerably more refined than the base cart.
The mobility is the feature. In a small kitchen, no piece of furniture should be stuck in one configuration. The cart can serve as a breakfast bar with two stools, a coffee station in the morning, and a prep station in the afternoon. One piece of furniture doing three jobs is exactly the kind of efficiency a small kitchen runs on.
8. Under-Cabinet LED Lighting
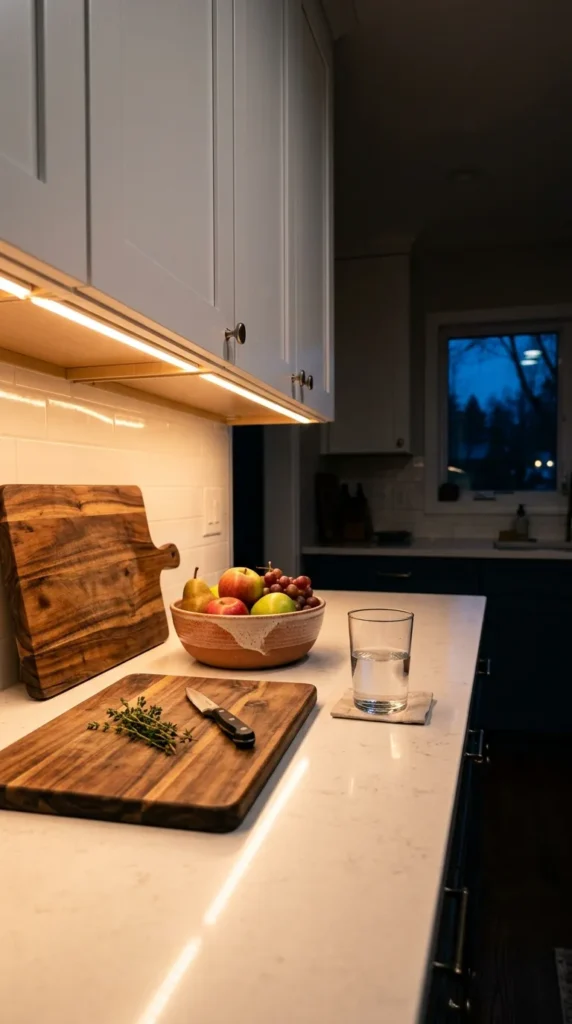
Under-cabinet lighting does two things at once. It adds functional task lighting directly where you prep food. And it makes the countertop glow, which visually extends the surface and makes the kitchen feel warmer and larger.
LED strip lights cost $15-40 for a full kitchen run. They stick directly to the underside of upper cabinets with adhesive backing, plug into a nearby outlet, and can be cut to any length.
Choose warm white (2700K-3000K) rather than cool white. Cool white LED strips make a kitchen feel like an office. Warm white makes it feel like a home.
Installation takes 20 minutes. Peel the backing, press the strip to the cabinet underside, connect the power cable, and plug in. No tools required for the basic version. Harder-wired versions look cleaner but need an electrician.
The effect is strongest in kitchens with tile or light stone backsplashes – the light bounces off the reflective surface and fills the whole work zone. In a galley kitchen, running strips under both sides of upper cabinets creates a runway of light down the center that makes the narrow space feel intentional rather than cramped. Budget upgrade with a significant visual impact.
9. Corner Carousel or Lazy Susan for Deep Corners
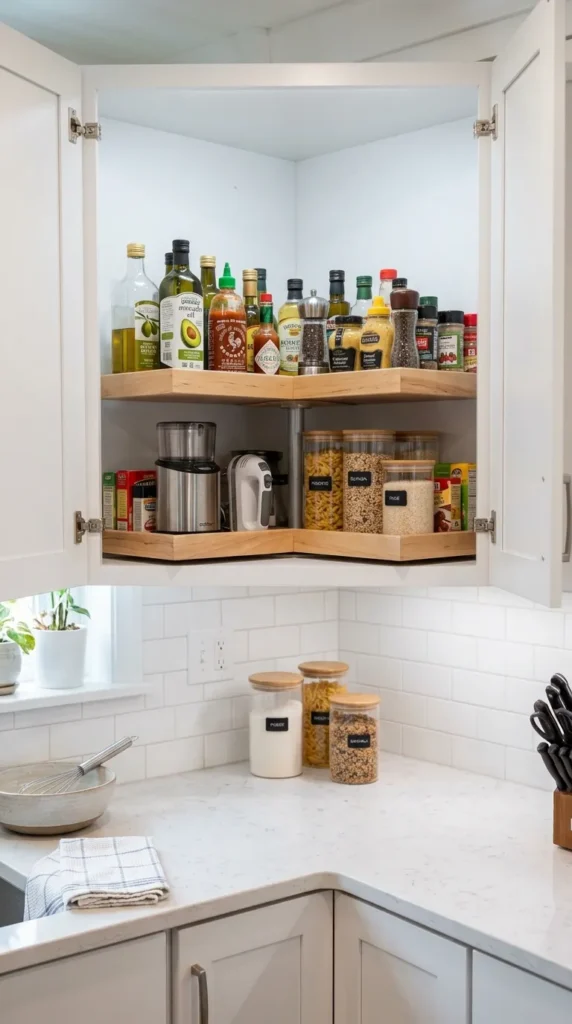
Corner cabinets are the most wasted space in small kitchens. Items go in, get pushed to the back, and disappear for months. A lazy susan or corner carousel spins to bring everything to the front.
Retrofit lazy susans cost $25-80 for a two-tier version that installs directly into an existing corner cabinet. No new cabinet required – the circular shelves drop in and attach to the existing interior.
Full-extension corner carousels (kidney-shaped shelves that swing out fully) cost $80-150 and give even better access than a spinning version. They’re worth the extra cost in kitchens where the corner cabinet holds heavy items.
What to store here: Oils, vinegars, condiment bottles, small appliances, canned goods – anything that’s annoying to retrieve from a deep cabinet. The carousel brings it all to arm’s reach.
The psychology of a small kitchen depends heavily on whether you trust your storage. When items routinely disappear into corners, the kitchen feels inadequate. When every cabinet holds its contents in an accessible, visible way, the same kitchen feels like it has enough room. The corner carousel converts the most frustrating storage spot into one of the most functional.
10. Mirrored Backsplash Behind the Stove
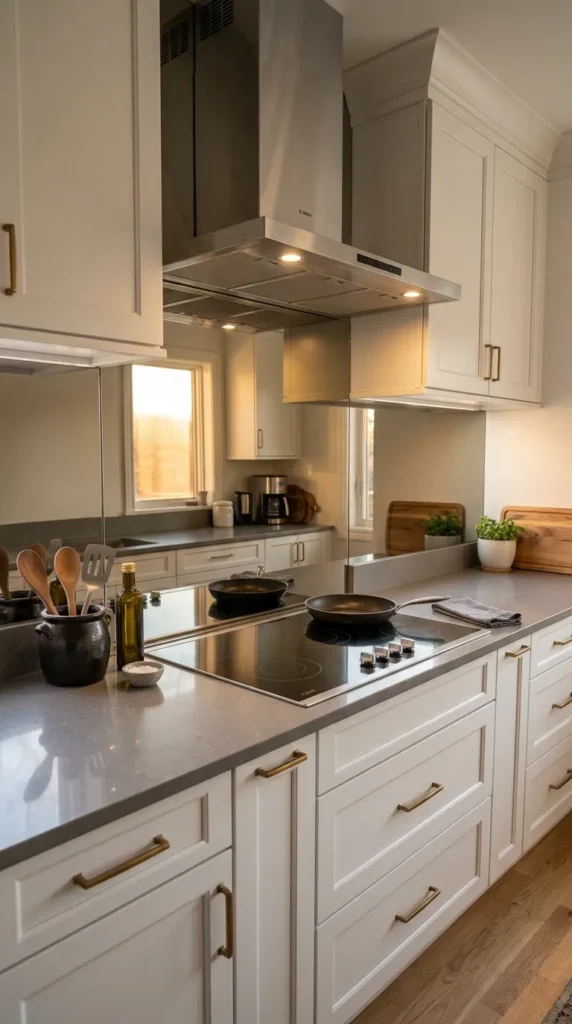
A mirrored backsplash behind the stove reflects the kitchen back on itself. The effect doubles the perceived depth of the room – like a window that looks into an identical kitchen.
Mirrored subway tiles or mirror panels cost $4-12 per square foot. A standard stove backsplash area of 24 by 30 inches uses about 5 square feet of material – total material cost under $60.
The mirror surface also amplifies natural light. Any window in the kitchen reflects across the mirrored backsplash and lights the room from two directions simultaneously.
Installation: Clean adhesive mirror tiles press directly onto a smooth, clean wall surface. No grout required. Full mirror panels can be cut to size and adhered with mirror mastic.
Keep the mirror surface clean – it shows splatter more visibly than tile. A quick wipe down after cooking keeps it looking sharp.
This idea works best in kitchens that already have some natural light. The mirror amplifies what’s there. In a kitchen with no windows, the reflection shows the opposite wall rather than light – which still adds depth but less dramatically. Pair it with under-cabinet LED lighting and the combined effect makes a small kitchen feel like it has a second light source built into the wall.
11. Single-Wall Layout With Everything in One Run
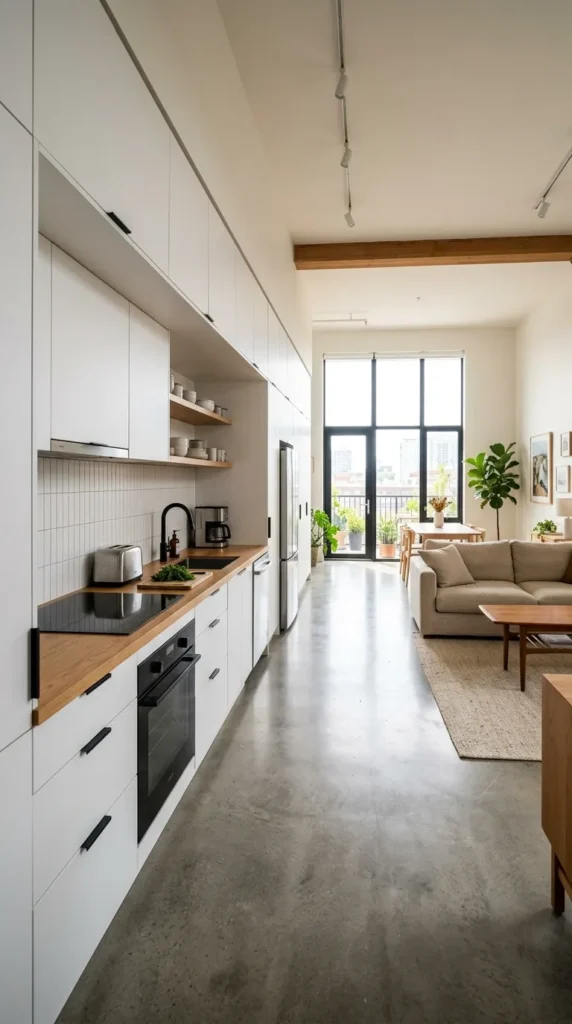
The single-wall kitchen layout puts everything along one wall – sink, stove, fridge, and counter in a straight line. It’s the most space-efficient layout for narrow rooms or open-plan spaces where the kitchen shares a room with a living or dining area.
It works best in rooms under 150 square feet where an L-shaped or galley layout would leave too little clear floor space for comfortable movement.
The trade-off is limited counter space. Counter extensions, fold-down wall tables, or a rolling cart solve this. Position the stove in the center of the run with counter space on both sides – this creates a functional cooking zone without crossing the kitchen repeatedly.
Appliance sizing matters here more than anywhere else. A 24-inch range instead of a 30-inch model gains you 6 inches of counter. A counter-depth fridge sits flush with cabinets and visually extends the clean line of the run.
The workflow triangle – sink, stove, and fridge forming a triangle with total sides under 21 feet – still applies even in a single-wall layout. Arrange them in the sequence: fridge, prep counter, sink, prep counter, stove. This mirrors the order food moves through a kitchen, from storage to prep to cooking.
12. Galley Kitchen Layout for Maximum Efficiency
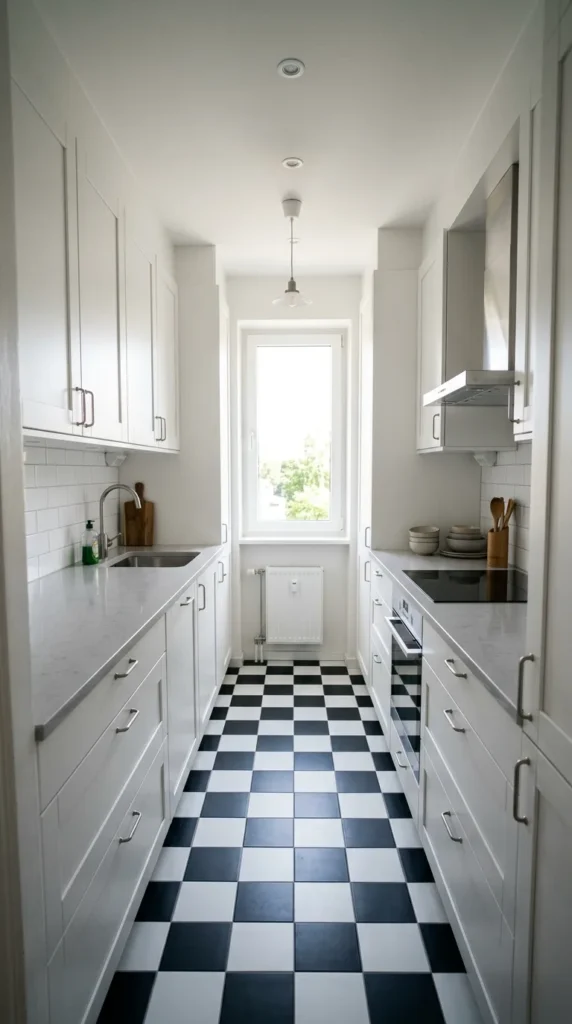
The galley kitchen – two parallel runs of cabinets facing each other – packs more storage and counter space into a narrow footprint than any other layout. Professional kitchens use it because it works.
The ideal galley width is 42 to 48 inches between counters. Narrow than 36 inches and two people can’t comfortably pass each other. Wider than 60 inches and the efficiency advantage disappears.
Place the sink and stove on the same wall. This keeps the plumbing run short and positions the two most-used stations close together. The opposite wall handles storage – a full run of base cabinets, drawers, and upper cabinets.
Add a window at the end of the galley if possible. A window at the end of the corridor draws the eye through the space and makes it feel longer rather than closed-off.
The common mistake in galley kitchens is adding a table or cart in the corridor. The efficiency of a galley comes from the unobstructed walkway between the two runs. Keep the floor clear. Put seating at the open end of the galley or at a fold-down table against one wall. The galley works because it’s a pure work corridor – treat it like one.
13. Pegboard on Any Empty Wall
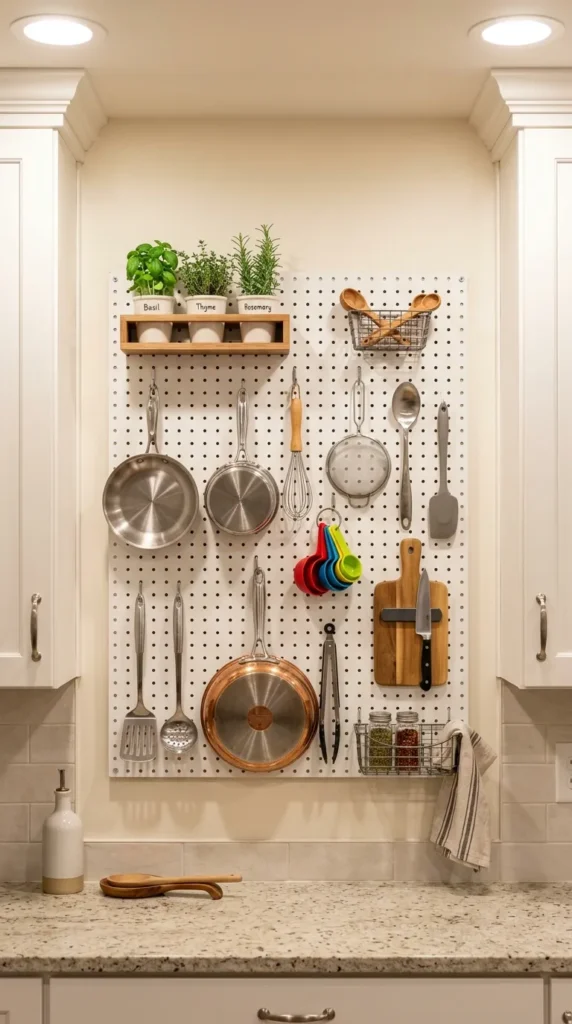
A pegboard panel on any wall – between cabinets, above a counter, on the back of a pantry door – turns a flat surface into storage for tools that normally pile up in drawers or on counters.
A 2×4 foot pegboard sheet costs under $15 at any hardware store. Paint it to match the wall or cabinets and it reads as intentional rather than utilitarian.
Hooks, shelves, bins, and small baskets all mount on standard pegboard pegs ($8-20 for an assortment pack). Reorganize the layout any time – peg positions aren’t fixed.
What to hang: Pots, pans, colanders, graters, cutting boards, measuring cups, spatulas, pot lids, small appliances, a roll of paper towels, frequently used spices in small containers.
Install the pegboard with 1-inch standoff spacers between the board and wall. This gap allows the peg hooks to pass through to the back. Without standoffs, the hooks have nothing to grip.
The pegboard earns its place in small kitchens because it makes the tool collection visible. When everything lives in drawers, locating anything wastes time. When tools hang on the wall, you grab what you need and return it in one motion. Think of it as the kitchen equivalent of a tool wall in a workshop – everything has a place, everything is visible, nothing gets lost.
14. Compact Appliances Sized to the Kitchen
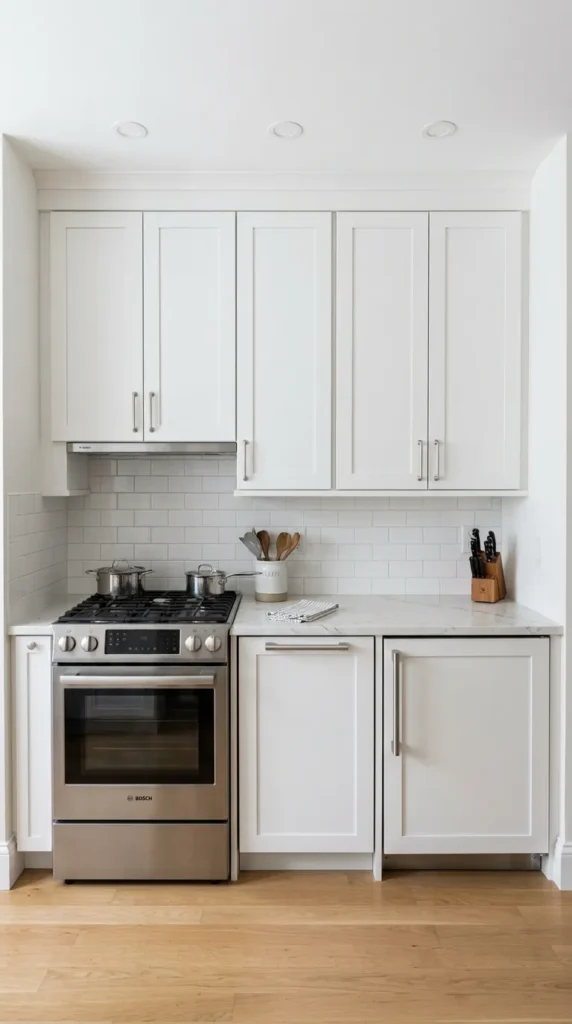
Standard appliances are sized for a medium kitchen. A 30-inch range, a full-depth 36-inch fridge, and a standard 24-inch dishwasher take up more counter depth and floor space than a small kitchen can afford.
Compact appliance sizing reclaims serious space. A 24-inch range versus a 30-inch model gains 6 inches of counter. A counter-depth fridge (24 inches deep) versus a standard model (30 inches deep) gains 6 inches of floor clearance and makes the kitchen feel considerably less crowded.
Two-drawer dishwashers measure 24 inches wide but only 17 inches tall – they fit under the counter like a standard dishwasher but with half the visual footprint.
Budget note: Compact appliances typically cost 10-20% less than standard sizes, not more. The smaller form factor often means better value.
The workflow triangle principle applies to appliance placement: sink, stove, and fridge should form a triangle with total sides between 13 and 21 feet. In a small kitchen, the triangle naturally stays tight. Keeping it under 18 feet total means you cover the full cooking sequence in a few steps rather than crossing the kitchen repeatedly.
15. Glass Cabinet Doors on at Least Two Uppers
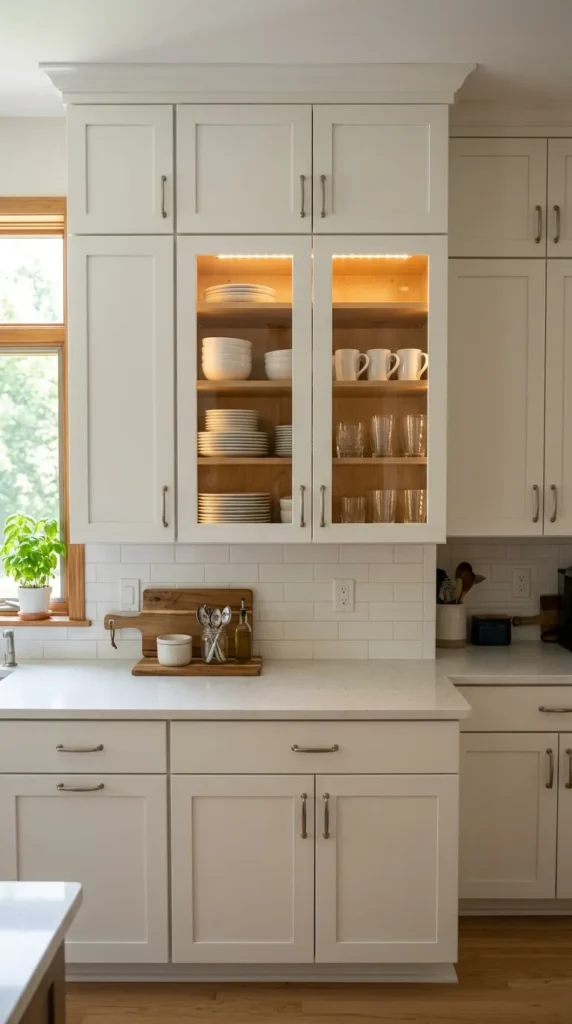
Replacing two solid upper cabinet doors with glass panels adds depth to the wall. The eye travels through the glass into the cabinet interior rather than stopping at the door surface.
Glass door inserts cost $20-60 per door including the glass and installation of the frame opening. Hire a cabinet maker for a cleaner result, or DIY with a router to cut the panel opening and standard cabinet glass.
Choose what you store behind the glass carefully. Glass doors display what’s inside. Stack dishware by color, line up matching containers, or store glassware. Items that don’t look good on display stay behind solid doors.
Interior cabinet lighting behind glass doors (small LED puck lights, $8 each) makes the glassware sparkle and adds a subtle ambient glow to the kitchen at night.
Two or three glass doors in a run of otherwise solid cabinets creates a rhythm. The solid doors frame the glass ones, and the glass ones create a visual break that makes the cabinet run feel less like a wall. In a small kitchen, anything that interrupts the flatness of a long cabinet wall makes the room feel less boxy. Glass doors do that job without costing much or requiring significant work.
16. Drawer Organizers for Every Kitchen Drawer
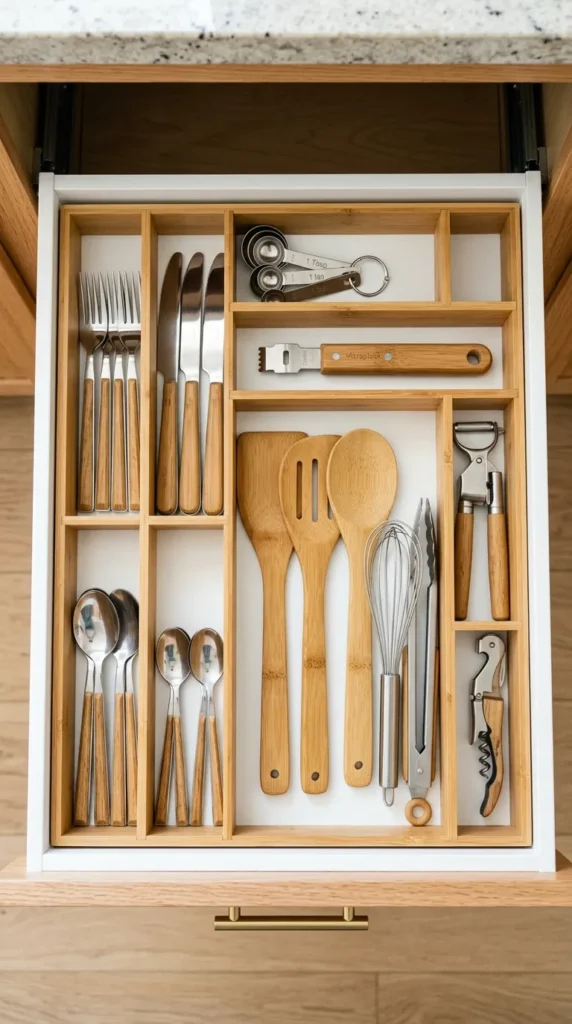
A small kitchen has limited drawers, which makes every drawer count twice as hard. An unorganized drawer holds a fraction of what an organized one does – and wastes time locating anything.
Bamboo or plastic drawer organizers cost $8-20 for a full set that divides a standard drawer into 6-10 sections. They expand to fit drawer widths and stack in deeper drawers.
Sort drawers by use zone: one drawer for cutlery, one for cooking tools, one for gadgets and small appliances. Keep the drawer nearest the stove for the tools you grab most – spatulas, tongs, ladles, a thermometer.
Vertical drawer dividers (narrow panels that stand upright inside a drawer) work for items that don’t stack neatly: cutting boards, pot lids, baking sheets. Stand them upright and pull out the one you need without disturbing the others.
The drawer next to the sink deserves special attention. Designate it for the three tools used in every meal preparation: a knife, a cutting board, and a peeler or vegetable prep tool. When those three items have a fixed location, meal prep starts faster and the counter stays cleaner. Organization in a small kitchen creates the same effect as adding storage – the space works harder without physically growing.
17. A Narrow Breakfast Bar Along One Wall
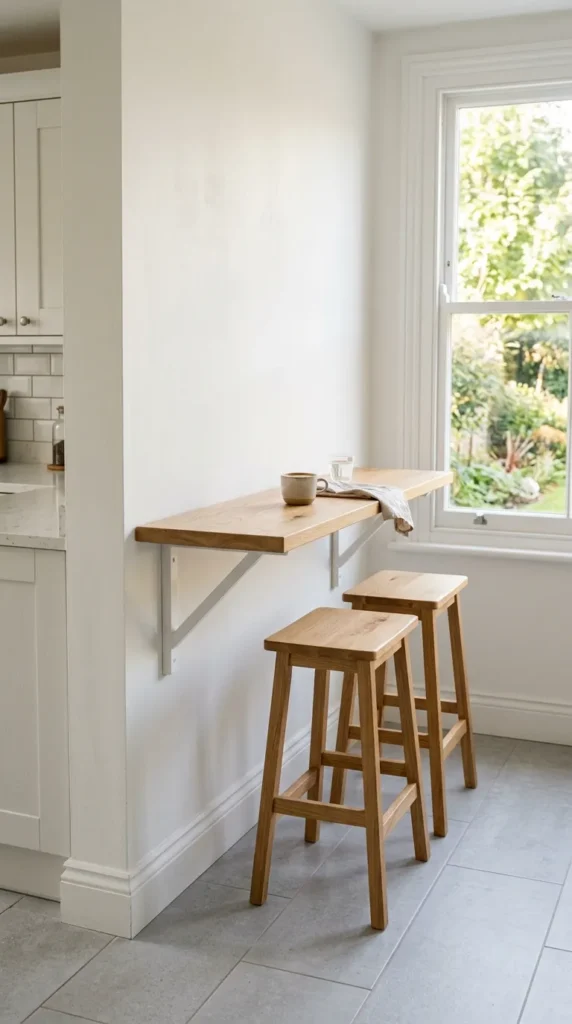
A breakfast bar along one wall adds seating for two without consuming the floor space a table requires. Mounted on angled or folded metal supports, a slim bar extends 10-12 inches from the wall – enough depth for a plate and a cup.
Wall-mounted breakfast bars cost $50-150 for a finished shelf with bracket supports. A custom version uses a length of butcher block or solid timber ($30-60 cut to size) mounted on heavy-duty angled brackets ($15-25 for a pair).
Height matters: 42 inches from floor to bar surface works with counter stools. 36 inches works with standard dining chairs if clearance allows.
Bar stools that tuck fully under the bar keep the floor clear when the bar’s not in use. Look for backless stools with a footrest at the 12-inch height mark – they slide completely under the overhang.
Position the breakfast bar on the wall opposite the kitchen work zone. This separates the eating area from the cooking area, creates a natural social barrier (people can sit and talk without being in the cook’s way), and uses what would otherwise be dead wall space. In an open-plan kitchen and dining room, the breakfast bar also defines the kitchen boundary without requiring a wall.
18. White or Light Tiles From Floor to Ceiling
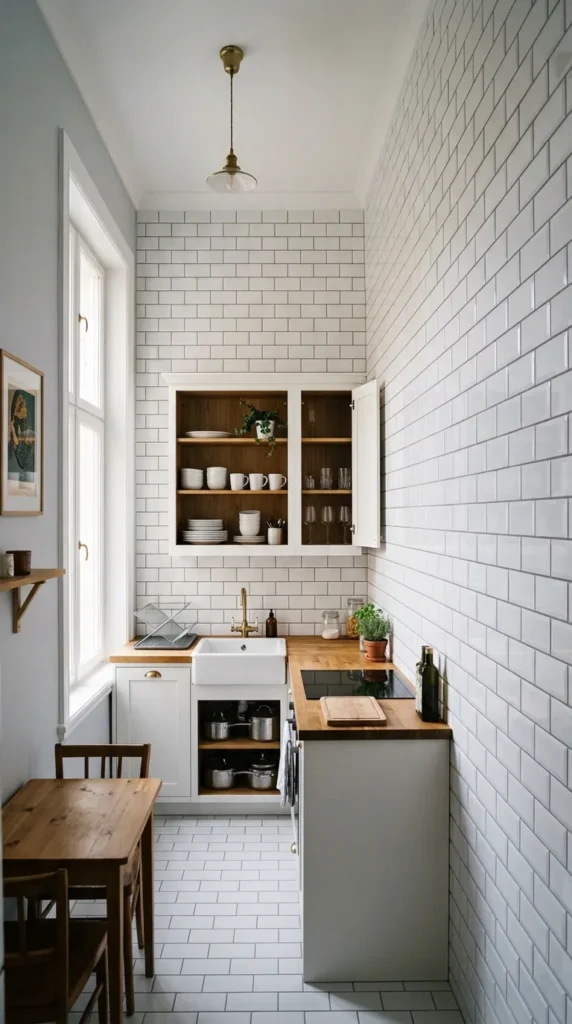
Tiling from floor to ceiling on one wall creates an unbroken vertical surface that reads as a single plane. The eye travels up rather than stopping at a grout line or paint change mid-wall.
Floor-to-ceiling tile on one wall costs $200-600 in materials depending on tile choice. Simple white subway tiles run $1-3 per square foot. Installing on one statement wall rather than the entire kitchen keeps the project affordable.
The reflective surface of glazed tile bounces both natural and artificial light. In a kitchen with limited window space, a full tile wall multiplies the available light.
Grout color matters. White grout makes the tile surface read as one unbroken plane. Grey or colored grout emphasizes the individual tiles. For a small kitchen, white or near-white grout keeps the wall looking as open as possible.
The psychological effect is the main value. A small kitchen with one dramatic tiled wall reads as designed rather than small. The tile tells the eye: this is a deliberate choice, not a limitation. That shift from “this kitchen feels cramped” to “this kitchen has a design feature” comes entirely from one wall treatment that costs a weekend and a few hundred dollars in materials.
19. Integrated Appliances Behind Cabinet Panels
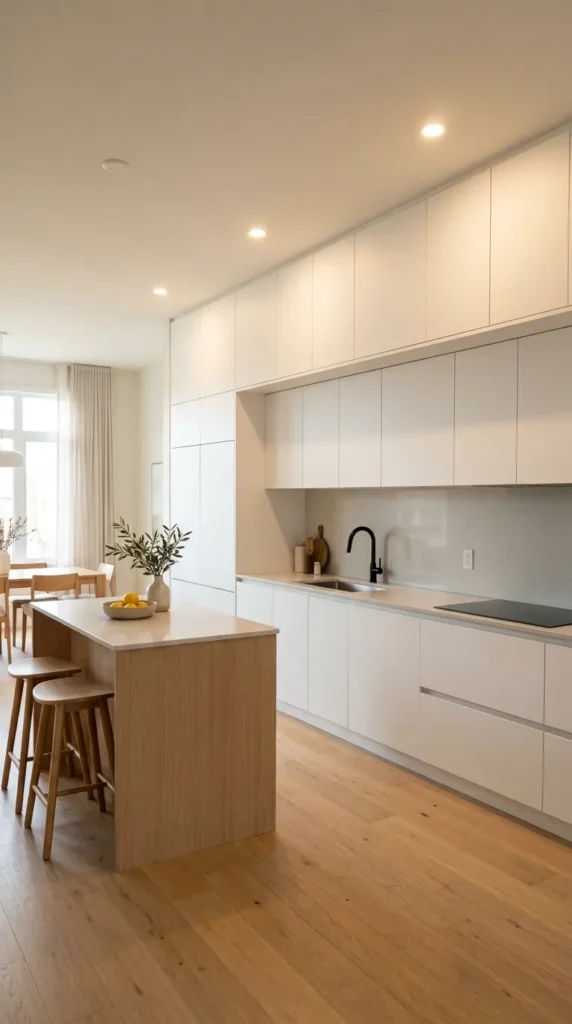
Integrated appliances – fridges and dishwashers hidden behind cabinet-matching panels – make a small kitchen look like one unbroken wall of storage rather than a collection of different appliances.
The visual effect is significant. A standard fridge takes up a recognizable rectangular footprint that the eye identifies as “appliance.” A panel-front fridge reads as part of the cabinet run. The room gains 3-4 square feet of visual space without changing anything physically.
Panel-ready appliances cost 15-30% more than standard versions. The panels themselves are ordered through the cabinet maker and typically run $150-300 per appliance.
Budget version: paint or vinyl-wrap existing appliance fronts to match cabinet color. This costs $20-60 for the wrap material and a careful weekend afternoon.
The most impactful integration is the fridge. It’s the largest appliance and the most visually disruptive in a small kitchen. Matching the fridge to the cabinets removes the single biggest visual interruption in the room. The dishwasher panel is easier and cheaper – most dishwashers accept a panel front with no modification required. Start with the dishwasher for a low-cost introduction to the integrated look.
20. Sink That Doubles as a Prep Station
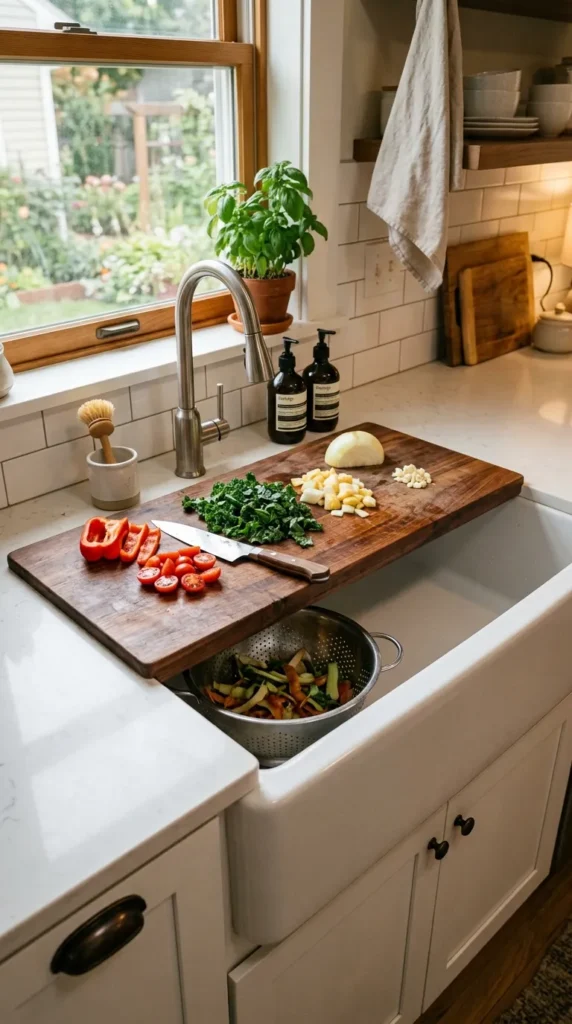
A cutting board that fits across the top of the sink converts a single fixture into a two-in-one workstation. Prep on the board, scrape scraps directly into the sink or a colander below.
Custom over-sink cutting boards cost $30-80. They’re made to the exact outer dimension of the sink and sit on the sink rim, spanning the basin. Buy one sized to your sink model or cut one from a butcher block offcut.
A colander that drops into the sink basin adds a third layer: rinse produce, drain pasta, strain liquids without using counter space for a separate bowl.
Single-basin sinks give more flexibility for over-sink accessories than double-basin models. If you’re replacing a sink in a small kitchen, a large single basin gives more usable workspace than a divided double basin.
The over-sink board adds roughly 4-6 square feet of effective prep space in a kitchen that may only have 8-10 square feet of counter. That’s a 40-60% increase in functional prep area from one $40 accessory. In a kitchen where counter space is the primary constraint, this is one of the highest-return investments available.
21. Ceiling-Mounted Pot Rack Above the Island or Stove
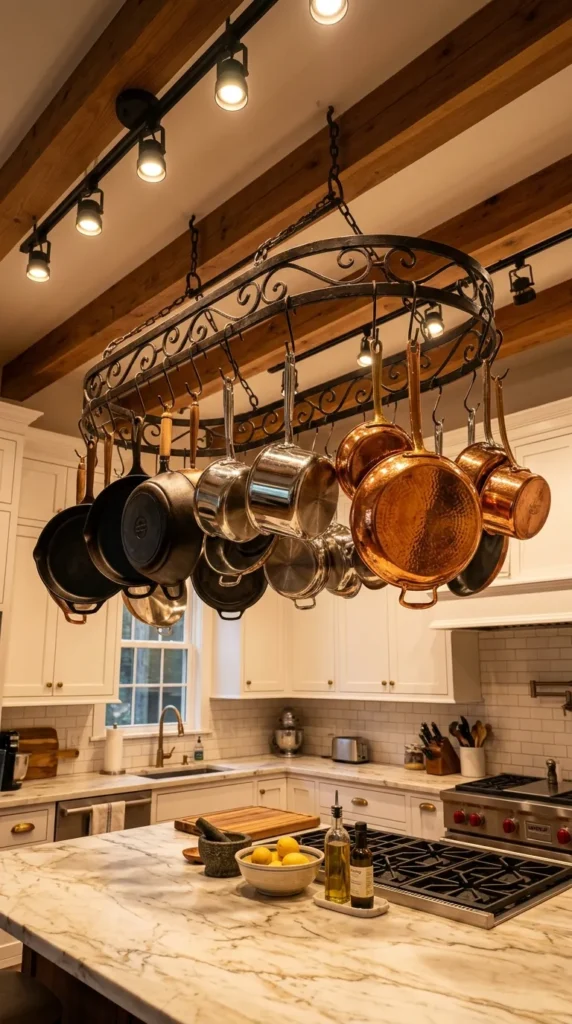
Pots and pans take up more cabinet space than any other kitchen item. A ceiling-mounted pot rack moves the entire collection off shelves and out of cabinets, freeing that storage for everything else.
Ceiling pot racks cost $50-200 depending on size and style. They hang from ceiling joists or a beam on adjustable chains, with S-hooks holding individual pots and pans.
Installation requirement: The rack needs ceiling joists or solid blocking to support 30-50 pounds of cookware plus the rack weight. Use a stud finder, locate two joists, and install eye bolts rated for the load.
Position the rack directly above the island or stove – wherever you cook. Having the pan 3 feet above where you use it means one arm reach to grab and return it.
The visual effect works in favor of a small kitchen. A pot rack adds height interest and draws the eye upward. Combined with open shelving and pendant lighting, it makes the ceiling feel further away. It’s one of the design moves that makes small kitchens look like intentional cooking spaces rather than spaces that happen to have cooking equipment in them. The cookware becomes part of the room’s visual character.
22. Two-Tone Cabinets to Add Visual Depth
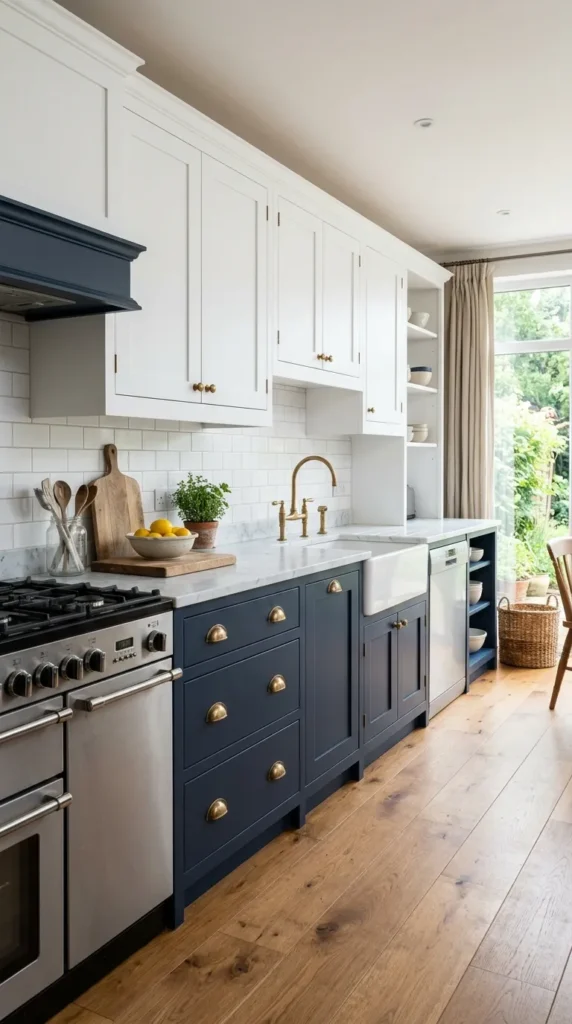
Two-tone cabinet color – light on top, darker on the bottom – creates a visual horizon line that makes the room feel taller. The lighter upper cabinets recede toward the ceiling while the darker lowers anchor the floor.
The most effective combinations: white uppers with navy, forest green, or charcoal lowers. The upper cabinet color matches the ceiling and wall, making that zone feel continuous. The lower cabinet color grounds the space.
Repainting existing cabinets two-tone costs $100-200 in paint and primer. Sand the surfaces, prime, and apply two coats of semi-gloss in the chosen colors. Cabinet paint (specifically formulated for high-traffic surfaces) holds up better than standard wall paint.
Hardware finish ties the two colors together. Brass or gold handles work with both navy and white. Black hardware suits charcoal or green lowers with white uppers.
This idea addresses a specific small kitchen problem: a single-color cabinet run reads as a flat wall. Two tones create a room within a room – the upper zone and the lower zone interact rather than merging into one surface. Designers use this principle in larger rooms too, but it’s most powerful in small kitchens where every visual trick that adds dimension makes a measurable difference to how the room feels.
23. Slim Appliances and Space-Saving Layout for Apartment Kitchens
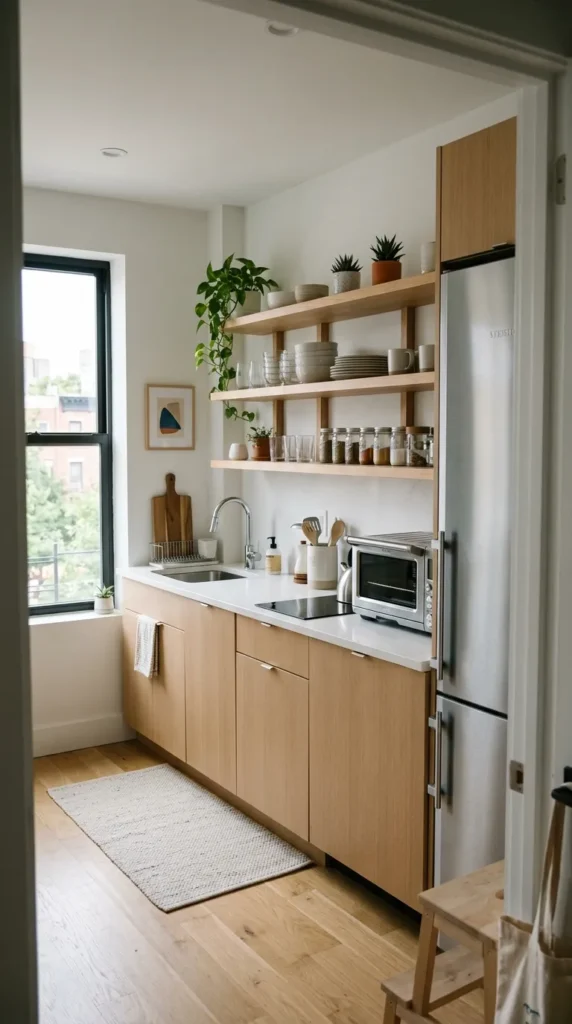
Apartment kitchens face a different set of constraints than house kitchens. They’re often smaller, harder to modify structurally, and limited in where plumbing and appliances can go.
Slim appliances are sized for this exact scenario. A two-burner induction cooktop (12 by 20 inches) sits on the counter and stores in a cabinet when not in use. A countertop convection oven replaces a full range. A 24-inch slim fridge fits spaces where a standard model won’t.
Replacing an under-counter fridge with a slim 24-inch model in an apartment kitchen is renter-friendly – no permanent modification required.
Open shelving instead of upper cabinets is the most impactful apartment kitchen change. Remove the upper cabinet doors (store them flat for when you move out), paint the cabinet interior a contrasting color, and the cabinets read as open shelves. Fully reversible, costs nothing.
Apartment kitchens work best when organized as zones: a prep zone, a cooking zone, and a cleanup zone, each with its tools within arm’s reach. When the three zones share equipment and tools migrate between zones on every use, the small space feels even smaller. Zone organization costs nothing and changes how the kitchen functions immediately.
24. Monochromatic Color Scheme Throughout
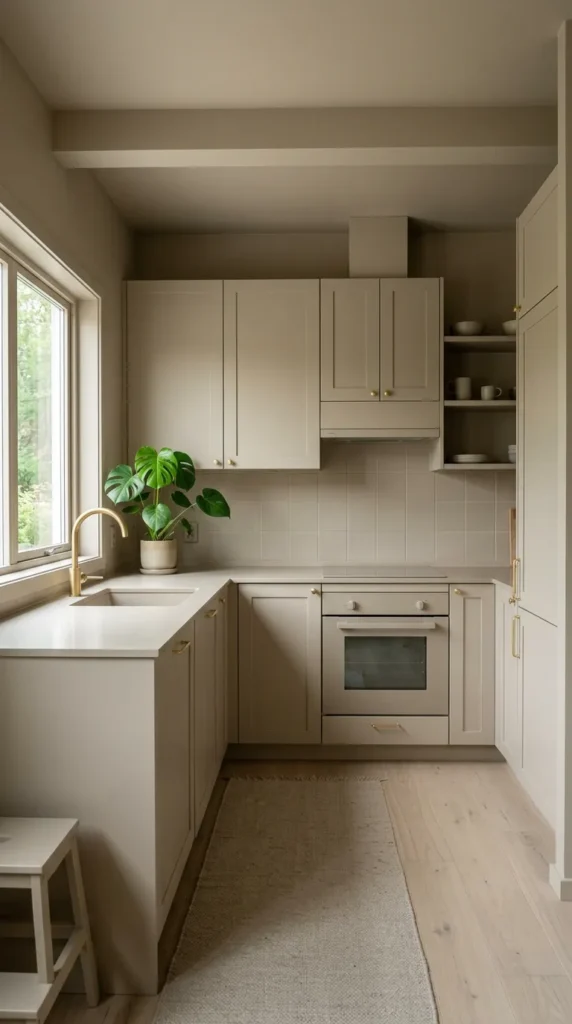
A monochromatic scheme – where cabinets, walls, and countertop all share the same color family – removes the visual borders that break a small kitchen into separate zones. The room reads as one continuous space rather than a collection of different elements.
The effect makes a small kitchen feel genuinely larger. When the eye can’t locate a border between the wall and the cabinet, it can’t accurately judge where one surface ends and another begins. The room becomes harder to measure visually.
Choose one mid-tone and carry it through: a warm greige, a soft sage, a dusty blue. Vary the finish – matte on walls, semi-gloss on cabinets, gloss on tile – to add texture without adding contrast.
One accent stops the scheme from feeling flat. A plant, a single piece of art, a fruit bowl in a contrasting color gives the eye something to land on.
This approach requires more planning than choosing two or three separate colors, but costs exactly the same – one color purchased in larger quantities rather than three colors in smaller ones. The budget is identical. The visual outcome in a small kitchen is substantially better. Monochromatic design is one of the most used techniques in professional interior photography for exactly this reason: it removes visual noise and makes the space look as clean and open as possible.
25. A Statement Backsplash as the Kitchen’s Focal Point
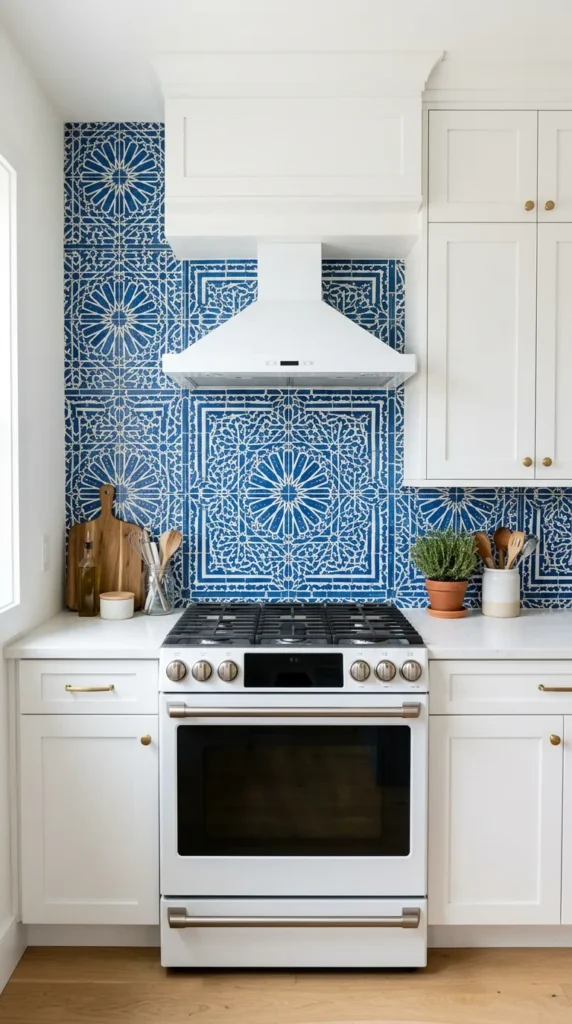
In a small kitchen, one strong focal point works better than several competing ones. A statement backsplash behind the stove becomes the room’s anchor – everything else stays neutral and the backsplash does the visual work.
Patterned tiles cost $4-25 per square foot depending on the style. A standard stove backsplash area uses 10-15 square feet of tile – total material cost from $40 to $375, making this one of the more affordable ways to add a design feature.
Keep everything else simple. White cabinets, plain countertop, no additional patterns. The statement backsplash earns its impact by being the only complex surface in the room.
Moroccan cement tiles, geometric porcelain, hand-painted ceramics, or bold subway tile in an unexpected color all work. The choice depends on the kitchen’s overall tone – warm and eclectic, cool and modern, or rustic and natural.
DIY installation: Tile adhesive, tile spacers, and grout from a hardware store. A 15-square-foot backsplash installs in a single weekend. Watch a tutorial specific to the tile type before starting – patterned tiles require more careful layout planning than plain subway tiles.
The focal point principle solves a design problem specific to small kitchens: too many competing elements make a small room feel busier and therefore smaller. One bold statement and a neutral background creates a room that feels considered rather than crowded.
Conclusion
A small kitchen gets better one decision at a time. Pull-out pantries, toe-kick drawers, ceiling pot racks, and over-sink cutting boards don’t require a renovation – they require an afternoon and a hardware store run. Layout changes like switching to a galley configuration or a single-wall setup cost more, but recoup the investment in daily usability. Light colors, mirrored surfaces, monochromatic schemes, and statement backsplashes change how the room feels without changing anything structural.
Start with the idea that addresses your kitchen’s biggest daily frustration. If counter space is the problem, the rolling cart or the fold-down table solves it this weekend. If storage disappears into deep cabinets, the corner carousel and toe-kick drawers fix it for under $100. If the room feels dark and closed-in, under-cabinet LED strips and a light paint refresh change it in a day.
Small kitchens work when every surface, every wall, and every cabinet does more than one job. Stack the solutions – open shelving plus pegboard plus vertical storage plus compact appliances – and the same footprint that felt limiting starts to feel intentional. That’s the difference between a kitchen that fights you and one that works with you.